How To Create Skull With Grunge Texture Adobe Illustrator Tutorial
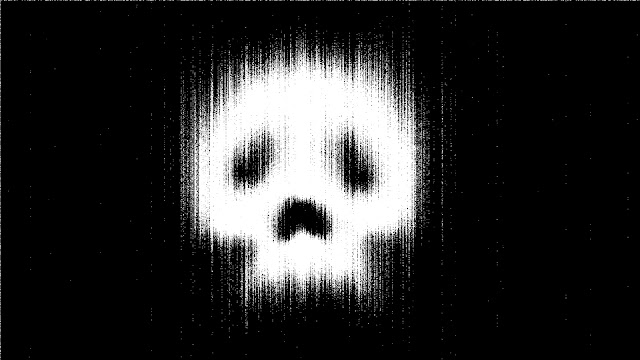
So Today, I’m gonna show you how to create this Skull Grunge Texture in Adobe Illustrator. It doesn’t need any plugin or import any image into adobe illustrator, all it takes only adobe illustrator. It’s very easy to do it only takes a few steps to make this grunge skull texture. First create a gradient and lastly we just give it a texture or you can start from making a texture first and then making a skull gradient.
You can watch the tutorial video. Or scroll down to find another way to learn this technique.
Texture in Adobe Illustrator is very rarely done especially in
vector work, most of texture work is done in Photoshop, but it's not impossible
to do, Adobe Illustrator has the ability that allows us to create a artwork by
adding textures in it.
So Today, I’m gonna show you how to create this Skull Grunge
Texture in adobe illustrator. it doesn’t need any plugin or import any image
into adobe illustrator, all it takes only adobe illustrator. it’s very easy to
do, it only takes a few steps to make this grunge skull texture. first create a
gradient, and lastly we just give it a texture, or you can start from making a
texture first and then making a skull gradient.
You can watch the tutorial video. Or scroll down to find another
way to learn this technique.
Video Version
Step 1: Create Textures with Simple Shape
Create document with any size, But before I create this skull shape, I'm going to create a simpler shape first to show you how this technique works, so that you can understand it more easily before continuing to make more complex shapes.
Create rectangle according to the artboard size, Give it a
gradient color and change the gradient type to radial, and it has to be
gradient because this is the core point of this technique.
Next step is just give it a texture. Go to the Effects Menu >
Texture > Grain. Set the intensity by 45, contrast to 100, and type to
vertical.
And here we are, we just did this effect with the simplest. Cool isn’t it?
The cool things about this technique is we are still possible to modify it. Open the Appearance Panel or you can open it in Window Menu and look for Appearance. In this Appearance Panel we can get information about the 'appearance' that contained in an object in this case the rectangle that we created earlier, There is information about Stroke and Fill. And here we have filled the fill with a Radial Gradient and the Grain Effect itself that we have added. There is an eye mark whose function is to enable or disable the appearance of this rectangle.
Let's try another shape so you can see the impact of the gradient to the texture, temporarily disable this Grain Effect so you can see the gradient without texture when modifying it. Open the Gradient Panel and set the Gradient Annotator like this with 3 color stop.
And when we go back to the Appearance Panel and reactivate the Grain Effect again, this is what we get. We have different result then before.
Its look like the ‘O’ shape and the Grain Effect gives the impression of a Grunge Texture on the white to black transition. And the cool part is we can still change the Grain settings again if we feel the texture is too contrast.
Just open the Appearance Panel again and click the Grain FX to open the Grain Panel and just play with the setting there. And if you still want to get more different result, just play with the gradient to create more gradient model or you can play with the colors.
The image above is a sample of several experiments playing with gradients. You can see the result is more satisfying and we can get more variation just with the Gradient.
I think you already understand the concept of this
technique, just play with Grain and Gradient and the shape of the texture is
depend on gradient shape.
So the next question is,
What about more complex shapes like this?How do we make it?
The answer is, Just Play with grain and gradient.
Step 2: Create Skull Grunge Texture
So in the next part, I'll show you how I made this Skull
Grunge Texture.
This skull is only one rectangle with gradient color.
You can see the picture above that is a silhouette of skull formed using Gradient. If you open the Gradient Panel, you can find three types of Gradients, Linear Gradient, Radial Gradient, and Freeform Gradient. And to make skull gradient above, we use Freeform Gradient.
The first step to this Create Skull Grunge Texture as usual is
create a Rectangle. Now we just need to give this rectangle with Freeform Gradient.
Open the Gradient Panel and activate the Freeform Gradient.
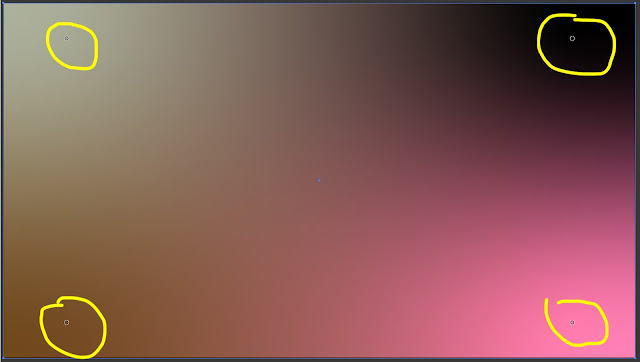
By default, we will get four points in each corner.
To edit these points we just need to select each of these points and move them. Besides that we can also change the radius of each of these points by using Widget, modify it with numbers in control panel overview you can change it there and it's easier.
Next, I'll give these four points a solid black color. just
click on it, and pick color in the Swatches Panel.
After all of these point in black, draw the skull using the
Lines on this Freeform Gradient.
Using this Lines is the same as using the Curvature Tool in the Toolbar.
Just draw a skull shape and color each point with the color
I show in the picture above.
After the Skull Shape is finish, create another Lines to create the detailed parts of the skull such as the eyes and nose.
Just follow my Freeform shape to get the same result, or you
can head over to the video How To Create Skull With Grunge Texture Adobe Illustrator Tutorial to see in detail how I created these Lines to form a skull
silhouette.
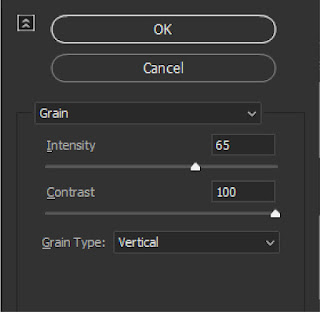
When you're done with the Gradient, just give it a Grain Texture.
Go to Effect Menu > Texture > Grain. Fill the
Intensity with 65, and the Contrast remains at 100.


0 Comments