How To Dynamic Create Line Wave Effect in Adobe Illustrator
Today I’m gonna show you How make a LINE WAVE EFFECT using Blend Tool & Mesh Tool. The blend tool is one of the most popular tools in Adobe Illustrator.The blend tool is one of the most popular tools in Adobe Illustrator, especially for creating modern abstract vector works, even though the actual function is just to blend one object into another but other than that the result of blending these objects creates a new cooler perception.
Step 1: Create New Document
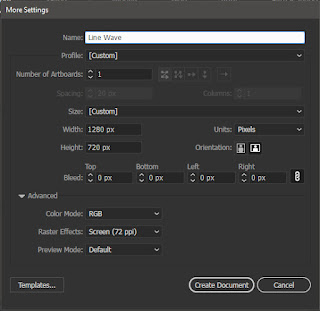
OK, lets Get Started.First of all, make a new document, by Click File on Menu bar, then select New On the New Document Panel, set the name what ever you like. On the profile, set it to Basic RGB. For unit I Choose Pixels. On document Width I set it with 1280 pixel and height with 720 pixel. and the rest I leave it as default.

Step 2: Create the Background
On the layer panel. I prefer to make a new layer, first layer for the background, and 2nd layer for the design that we want to make. Rename it, so we can easily to manage.If your layer panel didn’t show up, you can activate it by click Window on Menu Bar and search for ‘Layer’ or press F7 for shortcut.
I would like to create a background first. Don’t forget to select the background layer, because we’re gonna make our background on this layer.
For the background, use the Rectangle Tool (or press M on the keyboard), don’t forget to set the stroke to none, and bring the fill box to the top of the stroke. then draw a box following the size of the artboard.
For the background, use the Rectangle Tool (or press M on the keyboard), don’t forget to set the stroke to none, and bring the fill box to the top of the stroke. then draw a box following the size of the artboard.
Now we’ll give it a gradient color, Select the Gradient Panel over here. if you don’t have it just go to the Window on menu bar, and select Gradient.
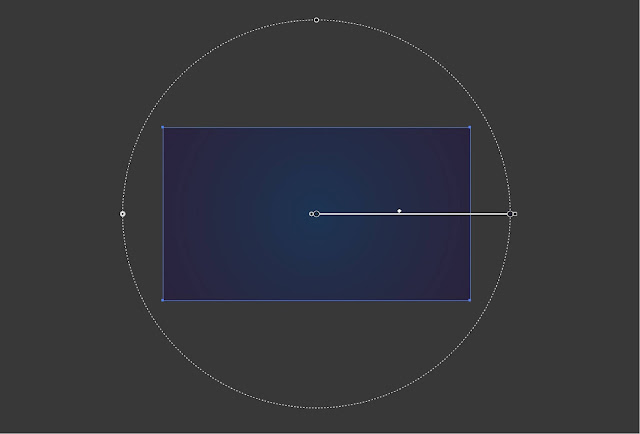
Set the gradient like this with color #2B223B, #1C3553, don’t forget to set Gradient Type to Radial.
If we look at the gradient, It’s looks too dark in the edge area. So, we have to adjust it, by click the Gradient Tool, and shifting the outer slider to point out, until the gradient color looks smooth.
For the last step, just lock the background on the layer panel, so the background layer can not be edited.
Step 3: Create Linewave
Create the Base Line
Now, for the LINE WAVE EFFECT just click the second layer to activate it cause we gonna make the line wave in this layer.Create horizontal line with Line Segment Tool, (or press backslash on the keyboard) and don’t forget to set stroke to white color.
Next, duplicate this line with the Transform Tool. Select the line, and go to the Effect on menu bar. Distort & Transform > Transform. on the Transform Effect panel. We have to Check the Preview, so we can see it effected the line. Because we want to duplicate the line vertically, so set the vertical move to 10 Pixel, and the number of copy to 72, leave the rest of setting as default, and click OK.
Because we have applied an effect on the line. So we able to edit the transform, if it has to. Open the appearance panel and click the Transform Effect, and the Transform Effect Panel will be appear, and the setting will be the same with what we have set before. To change it, just set the number, and the transform will be adapted with the new settings. Just click cancel to leave it, and move to the next step.
Make Perspective Illusion
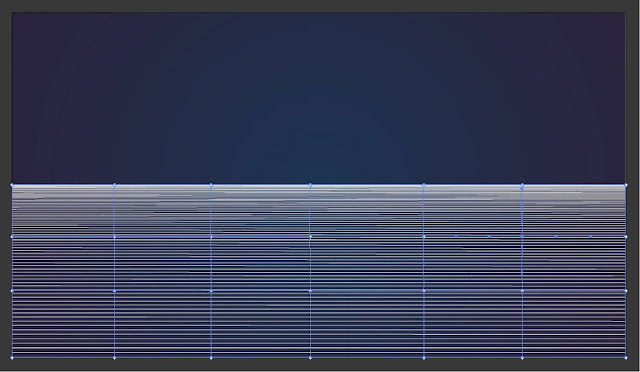
For the next step we will create a perspective effect. go to the Object on Menu Bar, Envelope Distort, and select Make With Mesh. Set the Rows and Columns to 1 then click OK.With Direct selection tool, select the anchor point on the left top corner, And move the vertical handle to the top until the handle almost touch the anchor point. Do the same way, to the right top corner of the anchor point.
What we got here, is that the top line have a close distance than the bottom line. Next, we have to make it more less distance. to do that, select the 2 top anchor point, and move it down to the center of artboard.
Create Random Wave
Now we will applied effect like random wave. With object still selected, select the Mesh Tool to applied another anchor point. I prefer to create the first anchor point on the middle of object. because it make it easier for me to determine another anchor point. In this tutorial, I’m create 5 horizontal anchor points, and 2 vertical anchor points.
Go back to Direct Selection Tool, and play with anchor points, and the handle.
Give it Colors
Now we can add colors to the line for more interesting look.But Before we add colors to the line we have to know that our object is not exactly a lines, but only one line that we have create on the first step and that line effected by 3 effects that we have to create to achieve that wave look, so we can not applying any color to our object.
So we have to change our object to lines. To do that, we have to Expand our object. just go to Object menu, and select Expand. on the Expand panel make sure the Object and Fill is checked, and click OK.
Now, our object is totally turn into many separated lines on one Group. This time, we able to set the stroke with any color we want. Remember, because the object are lines, so we must applying color in to stroke, not to the fill.
For the color, I use Gradient Color for more interesting wave look. set the first Gradient Color with these colors: #AF174A, # EC7680. Next, set the type to liner. and the angle to 90 degrees. The important thing to remember, is that the Gradient Type must be Linear, and the Angle of gradient must be 90 degrees. because if it isn’t, the gradient will have different effect applied to our object.
For the color, I use Gradient Color for more interesting wave look. set the first Gradient Color with these colors: #AF174A, # EC7680. Next, set the type to liner. and the angle to 90 degrees. The important thing to remember, is that the Gradient Type must be Linear, and the Angle of gradient must be 90 degrees. because if it isn’t, the gradient will have different effect applied to our object.
And here we are, the Line wave effect is perfectly done. You can also add some Creative ways to achieve another interesting looks. Like set the Stroke Weight to 1 point, set it to Round Cap, and add Dash Line.
Lastly I hope this tutorial helpfully and keep create something new. You can watch the video version on LADALIDI’s Youtube Channel: Create Dynamic Line Wave Effect in Adobe Illustrator Tutorial.


0 Comments