How To Create Blurry Glass Effect In Adobe Illustrator
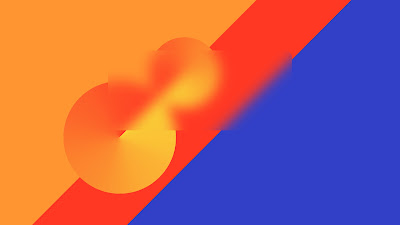
Welcome back to LADALIDI, in todays tutorial I’m gonna show you how to create this blurry glass effect with texture in adobe illustrator. The method is very easy and simple, just like the previous videos where everything is easy to follow even for a beginner. If you pay attention to the effect of this glass, it also has a texture so that it looks more realistic, so the object behind this glass follows the contours of the texture on the glass. watch the full video and don't forget to subscribe or like, if you have any questions, don't hesitate to ask in the comments column. without any further ado, lets jump into adobe illustrator.
Step By Step Blurry Glass Effect Adobe Illustrator Tutorial
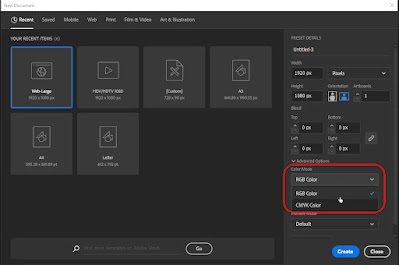
First thing first, create a document with RGB color mode.
Remember it must be in RGB.
 |
| Create New Document with RGB Color Mode |
Step 1 Create Artwork as Background
Now, we gonna create an artwork as a background, which on
this background we will put the glass effect on it. It doesn't matter what the
background is, you can make it freely however you want.
First, create a rectangle for the base using the rectangle
tool, color it with orange, You can get the color palette here (link color palette).
For an additional accent on this background I will give it 3
trapezoidal shape. And color it with red and blue.
Next, Create a circle using the ellipse tool with height and
width 270x270 pixels.
Set Fill to None and stroke weight 270 point, Give this
stroke of the circle with gradient red and yellow and change the stroke to “Apply
Gradient Along Stroke”.
Create another same cone with size to 170 pixel, as well as the stroke weight to 170 point. Rotate 45 degrees and Adjust the position until the line of the cone meets the background line
Right click on the new cone. Transform. And reflect. Select
vertical axis, and click ok. again, rotate with -45 degrees, Adjust the
position of these two cone so the yellow part meets each other, And parallels
with the background line.
The last step is create the glass effect. First, Group all the
object then duplicate it.
blur the newly grouped object using Gaussian Blur in Effect
Menu > Blur > Gaussian Blur. And set the radius to 30 pixels.
Now, we gonna make the glass object. Use rectangle tool to make a rounded long rectangle. And copy this rounded rectangle and don’t paste it yet, we just copy it and paste for the next step.
Select the blurred background object and this new rounded rectangle, Right click and Make clipping mask.
Go to the edit menu and paste in place for the rounded rectangle. Set the stroke to none, and set the fill with white. And change the blending mode from normal to Softlight in transparency panel. and don’t forget to lower the opacity to 50%.
Step 3 Create Blurry Glass Texture
Now, we gonna make the texture for this blurry glass. Just
use the paste in place again, or use the shortcut by pressing the CTRL shift +
V on the keyboard. Color it with 40% black. Go to the effect menu > Texture
> texturizer.
In the texturizer panel, set the texture type to sandstone.
Scaling up to 200. Relief to 5. Light is top. And just click OK.
Because this texture is covering all object behind it, we must blend it again to bring it back the object behind. In transparency panel, set the blending mode again to Softlight. Opacity: 50 percent.


0 Comments